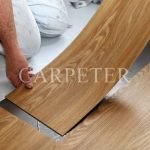
Hardwood flooring has its elegance and durability, and its installation can transform your living space. The professional installation of flooring is an expensive process, which is why it is not accessible to everyone. But don’t worry, you can opt for a DIY(Do It Yourself) installation.
In this blog, we will guide you on how to install hardwood floors. So, without any delay, let’s get started.
Step-by-Step Guide To Install Hardwood Floors
Here are the steps to follow to install the hardwood flooring by yourself.
1. Gather the Tools and Materials
Before installing the flooring, you should ensure that you have all the tools and materials needed. Here is the list of tools:
- Hammer( to fix or drive the nails)
- Measuring tape( to measure the space or area of the floor)
- Pry bar( to remove the old flooring and the baseboards)
- Chalk (to mark the area of the subfloor)
- Drill Machine ( to drill the holes in the floor)
- Knee pads( to protect your knees from injuries during flooring)
- Spacers( to maintain the gap between the boards and the wall)
- Circular saw( to cut the boards or give the finishing touch )
- Hardwood Flooring
- Underlayment
2. Remove the Existing Floors and Baseboards.
Before installing the new floor, remove the existing floors, such as carpets, tiles, vinyl, concrete, etc. Use the pry bar to remove the baseboards. You have to take care of the baseboards while removing them so that they can be reused. If you find any flooring material that may contain asbestos, which is harmful to health, you need to consult with a professional before proceeding with it.
3. Prepare the Subfloor
After removing the existing floors and baseboards, prepare the subfloor before proceeding. Vacuum it thoroughly to clean all the debris and dust. If you find the low or high areas, level them using any leveling compound. If there is any nail in the subfloor, use a hammer or screw to drive it. You need to use a moisture barrier if the subfloor contains concrete; the moisture should be within 2-4% for wood flooring. Keep in mind that you should level the surface; the subfloor should be flat and free from all debris.
4. Set up the Flooring
After collecting the materials and tools, the next step is to lay out the space to give it a balanced look. To do this, you need to measure the width and set the direction of the planks. Measure the width to get the square footage. Add 10% extra count to your measurement for waste and cuts. This measurement will help you ensure that you have enough material to complete the installation process.
After measuring the width, mark the center with a chalk line. Lay out some planks without nailing them and arrange them parallel to the longest wall of your room. You can also set them by placing them parallel to the light direction, which will help you check the board gaps.
5. Install An Underlay
Once you have set up the flooring, the next step is to install an underlay. The underlay will protect the subfloor from moisture and provide maximum stability.
6. Install First Row and Continue Installing
After installing the underlay, install the first row by using a nailer to fix the nails. You should ensure the expansion gaps between planks or tiles. Once the first row of boards has been installed successfully, continue installing all the rows accordingly.
7. Trim the Borders of the Door
When you have installed all the planks of flooring, you should trim the borders of the room door to give a finished look to your room.
8. Finish the Installation
After installing the flooring in the entire room, patch the nails near the walls, ensuring they are not visible. Check for any holes or gaps and fill them with wood putty or baseboard.
9. Clean the Floor
Once the installation has completed, clean the floor and enjoy your room.
Some Best Ways To Install Hardwood Floors:
You can install the wood flooring by following the steps below:
1- Floating Installation
Floating installation is done by adhering planks or tiles interlocked with each other without using adhesives. The planks are floating on the surface of the subfloor but do not attach to its surface. This method is DIY friendly; you don’t need a professional to install it. It is a budget-friendly installation that saves both time and money. You can easily do it at home and change the planks whenever needed. But it also has some cons; it is less durable for commercial areas. As it does not attach to the subfloor, it can move or float over time.
2- Glued-Down Installation
Glue-down installation is done by connecting the planks or tiles with adhesives. This method is usually used for high-traffic commercial areas. It is not a DIY installation; you need a professional for this type of installation. It has long-lasting performance. But it is not budget-friendly, you have to pay high costs for it, and it can’t be easily repaired.
3- Stapled Installation
In this process, the planks or tiles are installed by using staples 4-6 inches apart from each other. This is the easiest method to install flooring.
Things To Consider Before Installing Wood Flooring
You should take care of the following factors before installing the hardwood floors.
1- Measure The Area
Before buying the new floors, you should measure the area; its length and width, and then multiply them to get the square footage of your room, to get an idea about the material needed. You should add 10% extra count to your measurement for cuttings and waste.
2- Acclimatizing The Flooring
Hardwood can expand or contract due to changes in temperature, humidity, and other environmental factors. To avoid future problems, you should acclimate the flooring in your room. Store the flooring in the installation area 2-3 days before the installation process.
3- Choose the Wood Species
Hardwoods are of different types, such as Oak, Maple, Cherry, Hickory, etc. You should know the wood species and their characteristics before purchasing the hardwood flooring.
Conclusion:
Hardwood flooring can transform your home with beauty and elegance. DIY installation of flooring is not a difficult task. You can follow the points mentioned above to the letter for flawless results. If you face any problem with the floor fitting, don’t hesitate to consult with a professional.